Taro Purple Sweet Potato Mooncakes – Bánh Trung Thu Nhân Khoai Môn Khoai Lang Tím
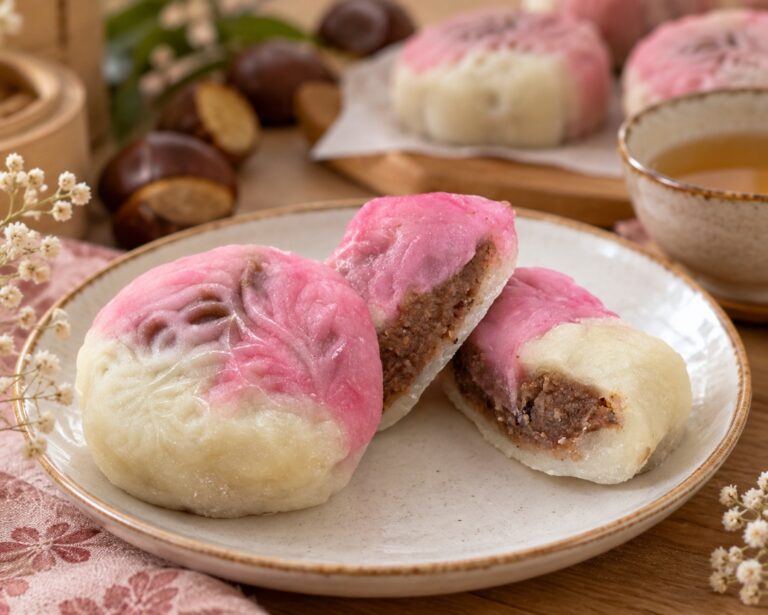
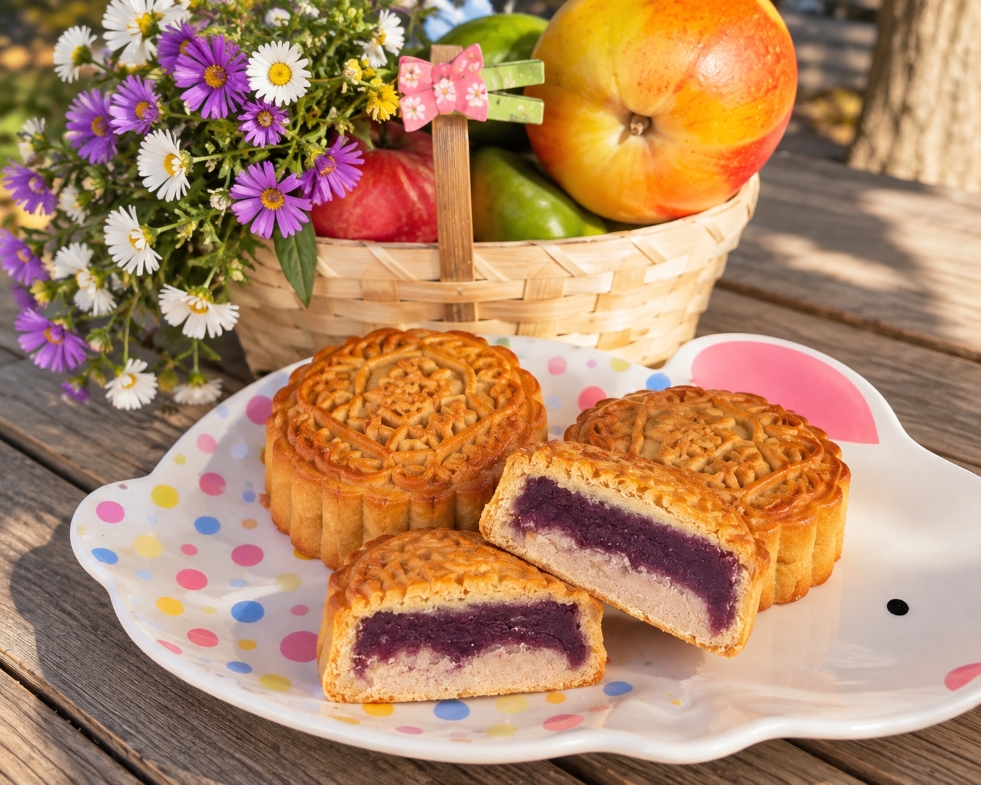
There is something special about homemade bánh trung thu. The beautiful moulded patterns, the golden baked crust and the moment you cut one open to reveal the filling are all part of the pleasure of making mooncakes at home.
For this version, I wanted a filling that was creamy and naturally earthy rather than overly sweet, so I combined taro and purple sweet potato with coconut milk.
Taro gives the filling its soft, rich texture, while purple sweet potato adds a beautiful purple colour and a slightly sweeter flavour. Coconut milk makes the paste creamy, and a little coconut gives it texture and aroma.
Wrapped in a thin golden mooncake crust, the result is a beautiful homemade bánh trung thu nhân khoai môn khoai lang tím that feels both traditional and a little different.
This post contains affiliate links. As an Amazon Associate I earn from qualifying purchases, at no additional cost to you.
Taro Purple Sweet Potato Mooncakes | Bánh Trung Thu
Ingredients
Method
- Peel the taro and purple sweet potato and cut them into pieces.
- Steam until completely tender. They should be soft enough to mash easily with a fork.
- Weigh 250 g cooked taro and 250 g cooked purple sweet potato.
- Place the cooked taro and purple sweet potato in a food processor with the coconut milk, sugar and salt. Start with 80 g coconut milk, blend, and add the remaining 20 g only if needed. Taro and sweet potatoes can vary quite a lot in moisture.
- Blend until very smooth.
- Try not to add extra water. If your blender has difficulty processing the mixture, add only a small amount at a time.
- Add the vegetable oil and blend again until completely incorporated.
- Mix the flour with 20 g water until smooth, then add it to the filling.
- Transfer the mixture to a wide microwave-safe bowl.
- Microwave at approximately 700–800 W for 2 minutes, then remove and stir thoroughly.
- Continue cooking in 2-minute intervals at first, stirring between each round.
- As the filling thickens, reduce the intervals to 1 minute.
- Towards the end, microwave for only 30 seconds at a time, stirring thoroughly after each interval.
- The filling is ready when it forms a soft, cohesive mass that holds its shape.
- Don’t make it too dry while it is hot. The taro, sweet potato and coconut will continue to absorb moisture as the filling cools.
- Let the filling cool completely before weighing and rolling it into balls.
- Combine the golden syrup, custard powder, egg yolk and vegetable oil in a mixing bowl.
- Mix until smooth and evenly combined.
- Add 165 g cake flour and gently mix with a spatula until a soft dough forms.
- At this stage, don’t automatically add all of the additional flour. Different brands of flour absorb liquid differently.
- Cover the dough and let it rest for approximately 30–45 minutes.
- After resting, check the consistency. If the dough is still too sticky to work with, add additional cake flour gradually until it becomes soft, smooth and manageable.
- Avoid adding too much flour. The dough should remain supple enough to stretch around the filling without cracking.
- Also avoid kneading it like bread dough. Mix only as much as necessary to bring everything together.
Egg Wash
- Mix gently until combined.
- Try not to whisk vigorously because you don’t want lots of bubbles in the egg wash.
- Make sure both the filling and dough are completely cool before assembling.
- Divide the filling into balls according to the size of your mooncake mould.
- For a classic thin-skinned baked mooncake, I like approximately 30% dough to 70% filling.
- For example:
- 100 g mooncake: approximately 30 g dough + 70 g filling.
- 75 g mooncake: approximately 23 g dough + 52 g filling.
- The exact ratio can be adjusted depending on your mould and how comfortable you are wrapping a thin mooncake skin.
- Roll a portion of dough into a ball and gently flatten it into a disc.
- Place the filling in the centre.
- Slowly push and stretch the dough upward around the filling until it is completely enclosed. Pinch the seam closed and gently roll it into a smooth ball.
- Lightly dust the mooncake and mould with cake flour, shaking off all excess flour.
- Place the ball into the mooncake mould and press firmly onto a lined baking tray.
- Carefully release the mould.
- Preheat the oven to 180°C.
- Lightly mist the mooncakes with water before baking if desired.
- Bake for approximately 8–10 minutes, just until the crust has set and the pattern is firm.
- Remove from the oven and allow the mooncakes to cool for approximately 10–15 minutes.
- Brush a very thin layer of egg wash over the surface. Don’t allow egg wash to pool inside the detailed patterns of the mould.
- Return to the oven and continue baking until the mooncakes are evenly golden, approximately another 10–15 minutes, depending on your oven and the size of the mooncakes.
- Keep an eye on them towards the end because the egg-washed surface can brown quickly.
🥄 Need to convert a measurement in this recipe? I made a little converter for exactly that — take a look here.
If you are looking for the molds to make the form like I did, there are many options here.
Don’t Eat Them Straight from the Oven!
Freshly baked mooncakes can look a little dry and feel firmer than expected.
Let them cool completely, then store them in an airtight container. Over the following day or two, the crust gradually softens and develops the characteristic richer, slightly glossy appearance of baked mooncakes.
This resting period makes a surprisingly big difference.
Why Taro and Purple Sweet Potato?
Taro mooncake filling is already loved for its rich, earthy flavour and smooth texture. Adding purple sweet potato gives it another dimension: natural sweetness, a beautiful colour and a slightly different creamy texture.
Then comes the coconut.
Coconut milk adds richness without overwhelming the roots, while coconut flakes provide just a little texture inside the otherwise smooth filling.
And because the filling uses only 70 g sugar for 500 g of taro and sweet potato, it isn’t excessively sweet.
For me, that’s exactly how a mooncake should be: enough sweetness to feel like a celebration, but not so much that you lose the flavour of the ingredients.
How to Store Homemade Mooncakes
Once completely cool, store the mooncakes in an airtight container.
Because this homemade filling contains fresh taro, purple sweet potato and coconut milk and doesn’t contain commercial preservatives, I prefer keeping the mooncakes refrigerated after their initial resting period.
Let a refrigerated mooncake come closer to room temperature before serving for a softer crust and fuller flavour.
Serve in small wedges with a pot of hot tea.
This post contains affiliate links. As an Amazon Associate I earn from qualifying purchases, at no additional cost to you.
A Colourful Twist on Bánh Trung Thu
Bánh trung thu doesn’t always have to be lotus seed, mung bean or mixed nuts.
Taro and purple sweet potato create a filling that is creamy, fragrant and naturally beautiful, while coconut brings everything together.
Cutting through that golden crust to reveal the purple centre might just be my favourite part.
Happy Mid-Autumn Festival! 🌕🥮
Looking for more inspiration? Explore more Chez Thao Hoang recipes for homemade dishes, seasonal favourites and sweet treats.